Please click here or below link watch the video for product creation in AX7
https://youtu.be/T5t9EdBmDDw
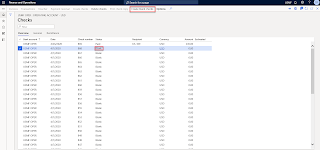
product Creation
1.
Go to Product information management >
Products > Released products.
2.
Expand the Product image fact box
3.
Click New.
4.
In the Product number field, type a value.
5.
In the Product name field, type a value.
6.
In the Item model group field, click the drop-down
button to open the lookup.
7.
In the list, find and select the desired record.
8.
In the list, click the link in the selected row.
9.
In the Item group field, click the drop-down
button to open the lookup.
10.
In the list, click the link in the selected row.
11.
In the Storage dimension group field, click the
drop-down button to open the lookup.
12.
In the list, find and select the desired record.
13.
In the list, click the link in the selected row.
14.
In the Tracking dimension group field, click the
drop-down button to open the lookup.
15.
In the list, click the link in the selected row.
16.
In the Inventory unit field, click the drop-down
button to open the lookup.
17.
Close the page.
18.
In the BOM unit field, click the drop-down
button to open the lookup.
19.
In the switch View field, select an option.
20.
In the list, find and select the desired record.
21.
In the list, click the link in the selected row.
22.
In the BOM unit field, type a value.
23.
In the BOM unit field, click the drop-down
button to open the lookup.
24.
In the list, find and select the desired record.
25.
In the list, click the link in the selected row.
26.
Click OK.
27.
In the list, click the link in the selected row.
28.
Toggle the expansion of the General section.
29.
Toggle the expansion of the Purchase section.
30.
Check or uncheck the Latest purchase price checkbox.
31.
Toggle the expansion of the Purchase section.
32.
Toggle the expansion of the Engineer section.
33.
Click Save.


Nice blogpost and thanks for sharing such useful information about Microsoft Dynamics.To get more best work opportunity in USA you should visit at Microsoft Dynamics 365 Recruitment.
ReplyDelete