Please click here or below link watch the video for Process Manufacturing scenario in Dynamics AX2012R3
Sunday, March 27, 2016
Monday, February 29, 2016
Consistency Check Tool in Dynamics AX 2012R3
Tables in Dynamics AX 2012 are divided into different categories: Main tables such as Customers, Ledger Accounts, Vendors, Items, etc, Transaction headers such as Sales headers, Purchase order headers, etc, and transaction details such as Sales lines, PO lines, etc. These tables are all related to each other through keys. For example when a sales order is created for customer A123, the customer, sales header and sales line are all linked to each other.
Occasionally one or more of these transaction records can be abandoned, meaning the parent data was deleted but the transaction still exists. We call these orphans because they exist in the database but are not connected to any other record. While these orphans by themselves cause no problem, they take up space in the database and given enough time, a lot of these orphaned records can cause performance issues.
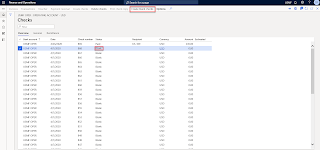
Dynamics AX 2012 has a tool to spot and remove these orphans. It’s called the Consistency Check tool. It basically runs through the entire database and locates transaction records that do not have any parent record associated with them. The Consistency check tool is located under System Administration > Periodic > Database > Consistency Check
Occasionally one or more of these transaction records can be abandoned, meaning the parent data was deleted but the transaction still exists. We call these orphans because they exist in the database but are not connected to any other record. While these orphans by themselves cause no problem, they take up space in the database and given enough time, a lot of these orphaned records can cause performance issues.
Dynamics AX 2012 has a tool to spot and remove these orphans. It’s called the Consistency Check tool. It basically runs through the entire database and locates transaction records that do not have any parent record associated with them. The Consistency check tool is located under System Administration > Periodic > Database > Consistency Check
Tuesday, February 9, 2016
New look in AX7 (Build version is 7.0.1265.3007)
Sunday, February 7, 2016
AX2012R3 Report extension
Wednesday, February 3, 2016
AX2012R3 Installation
In this series we will discuss how to install dynamics AX 2012 R3 step by step. we will start by installing AX Basic Components after that we will move to initialization checklist
Please click here or below link watch the video for Fleet Management in Dynamics AX2012R3
Tuesday, February 2, 2016
Fleet Management in AX7
Microsoft Dynamics AX7 introduced Fleet Management. Fleet Management is a function which allows companies which rely on transportation in business to remove or minimize the risks associated with vehicle investment, improving efficiency, productivity and reducing their overall transportation and staff costs.
Please click here or below link watch the video for Fleet Management in Dynamics AX7
Please click here or below link watch the video for Fleet Management in Dynamics AX7
https://youtu.be/4JAQBNZ2Rdk
Fleet Management
1.
Go to Fleet management > Setup > Fleet
setup.
2.
Click the Rental charge types tab.
3.
Click Add.
4.
In the Rental charge type field, type a value.
5.
In the Amount per unit field, enter a number.
6.
In the Description field, type a value.
7.
Click Save.
8.
Click the Vehicle make and models tab.
9.
Click Add.
10.
In the Make field, type a value.
11.
Click Add.
12.
In the Model field, type a value.
13.
In the Year field, enter a number.
14.
In the Model specification field, type a value.
15.
Click Save.
16.
Click the Rental discounts tab.
17.
Click Add.
18.
In the list, mark the selected row.
19.
In the Name field, type a value.
20.
In the Description field, type a value.
21.
In the amount field, enter a number.
22.
In the Charge type field, click the drop-down
button to open the lookup.
23.
In the list, click the link in the selected row.
24.
Click Save.
25.
Close the page.
26.
Go to Fleet management > Customers >
Customer.
27.
Click New.
28.
In the First name field, type a value.
29.
In the Last name field, type a value.
30.
In the Drivers license field, type a value.
31.
In the list, mark the selected row.
32.
Click Remove.
33.
Toggle the expansion of the Payment information
section.
34.
Click Save.
35.
Click the TabPageGrid tab.
36.
Close the page.
37.
Go to Fleet management > Rentals > Rental.
38.
Click New.
39.
In the Vehicles field, click the drop-down
button to open the lookup.
40.
Close the page.
41.
Refresh the page.
42.
Click New.
43.
In the Vehicles field, click the drop-down
button to open the lookup.
44.
Close the page.
45.
In the Vehicles field, click the drop-down
button to open the lookup.
46.
Close the page.
47.
In the Vehicles field, click the drop-down
button to open the lookup.
48.
In the list, find and select the desired record.
49.
In the list, click the link in the selected row.
50.
Resolve Changes the Vehicles.
51.
In the Customer field, click the drop-down
button to open the lookup.
52.
In the list, find and select the desired record.
53.
In the list, click the link in the selected row.
54.
Click Add line.
55.
In the list, mark the selected row.
56.
In the Rental charge type field, click the
drop-down button to open the lookup.
57.
In the list, click the link in the selected row.
58.
Click Save.
59.
In the Status field, select an option.
60.
Click Save.
61.
Click Complete rental.
62.
Click the TabPageGrid tab.
Monday, February 1, 2016
Transfer orders overview in AX7
You use transfer orders to handle items that are in transit between warehouses within the same company, but across different geographical sites. You can manage transfer orders from the Transfer orders form.
Please click here or below link watch the video for Transfer orders overview in Dynamics AX7
4. In the To warehouse field, click the drop-down button to open the lookup.
5. In the To warehouse field, type a value.
6. Close the page.
7. Click Add.
8. In the Item number field, click the drop-down button to open the lookup.
9. In the Item number field, type a value.
10. Close the page.
11. Click Save.
12. On the Action Pane, click Ship.
13. Click Generate picking list.
14. In the list, mark the selected row.
15. In the list, unmark the selected row.
16. In the Update field, select an option.
17. Click OK.
18. On the Action Pane, click Ship.
19. Click Picking list registration.
20. Check or uncheck the Select checkbox.
21. Click Updates.
22. Click Update selected.
23. Close the page.
24. Refresh the page.
25. On the Action Pane, click Ship.
26. Click Ship transfer order.
27. In the list, mark the selected row.
28. In the Update field, select an option.
29. Check or uncheck the Auto receive checkbox.
30. Click OK.
31. On the Action Pane, click Receive.
32. Refresh the page.
33. On the Action Pane, click Receive.
34. In the list, mark the selected row
35. In the Update field, select an option.
36. Click OK.
Please click here or below link watch the video for Transfer orders overview in Dynamics AX7
Transfer orders overview in AX7
1.
Go to Inventory management > Inbound orders
> Transfer order.
2.
Click New.
3.
In the From warehouse field, type a value.4. In the To warehouse field, click the drop-down button to open the lookup.
5. In the To warehouse field, type a value.
6. Close the page.
7. Click Add.
8. In the Item number field, click the drop-down button to open the lookup.
9. In the Item number field, type a value.
10. Close the page.
11. Click Save.
12. On the Action Pane, click Ship.
13. Click Generate picking list.
14. In the list, mark the selected row.
15. In the list, unmark the selected row.
16. In the Update field, select an option.
17. Click OK.
18. On the Action Pane, click Ship.
19. Click Picking list registration.
20. Check or uncheck the Select checkbox.
21. Click Updates.
22. Click Update selected.
23. Close the page.
24. Refresh the page.
25. On the Action Pane, click Ship.
26. Click Ship transfer order.
27. In the list, mark the selected row.
28. In the Update field, select an option.
29. Check or uncheck the Auto receive checkbox.
30. Click OK.
31. On the Action Pane, click Receive.
32. Refresh the page.
33. On the Action Pane, click Receive.
34. In the list, mark the selected row
35. In the Update field, select an option.
36. Click OK.
Subscribe to:
Comments (Atom)
Create checks that have Blank status for D365FO
Introduction Microsoft released a new Feature in version 10.0.3 of Dynamics 365 for Finance and Operations related to Checks in Blank ...
-
 Create Jobs and publish them on Organization portal: Go to Human Resource -> Jobs -> Jobs. Create a new job. In this case...
 -
Microsoft Dynamics AX7 introduced Fleet Management. Fleet Management is a function which allows companies which rely on transportation in bu...
-
 Delivery schedules allow you to track order line quantity when you are using multiple deliveries for a single sales order, sales quotat...