Tuesday, March 7, 2017

Consignment inventory functionality in dynamics 365


Consignment stock is often used in Lean manufacturing implementations, With the addition of the “owner” inventory tracking dimension, Consignment inventory can now be set up and tracked from requirement to receipt, then on to use and finally payment.  Only inventory quantities and transactions are tracked in Dynamics 365; no financial impact is recorded to general ledger until ownership is transferred.  Consignment is now an activity on the Procurement and Sourcing Area Page where Replenishment Orders and Inventory Ownership can be managed.

So, let’s walk through this new functionality, and note that this is only available for Dynamics 365 for Operations – it’s not available for Dynamics AX 2012.
  

Inventory owners. Inventory management > Setup > Inventory owners:


Here, we are setting up a link between our vendor and the Owner inventory dimension, and defining the default dimension which represents our own inventory.

Tracking dimension group. Product and information management > Setup > Dimension and variant groups > Tracking dimension group:

We’ve created a new Dimension group with the ‘Owner’ dimension active – in the current version you can’t enable batch or serial tracking (well you can on this form, but you get an error when you try to create an item with this Tracking dimension group).

Inventory ownership change journal. Inventory management > Setup > Journal names > Inventory:

Apart from the new Journal type, and of course we can define a default Ownership change journal name:

Next I’m creating a new Consignment stock warehouse. This isn’t strictly part of the process, but it’s the way I’ve seen this process being managed in practice. Inventory management > Setup > Inventory breakdown > Warehouses:

Note. Don’t be tempted to use the warehouse Vendor account on your Consignment warehouse. That field is related to the sub-contract production process (where you want to deliver to your sub-contract vendor), so it defaults the warehouse delivery address. In this context, you’d have products going around in circles.

Now we can setup a new item, and assign that Tracking dimension group. Note that only standard cost, and moving average inventory cost models are supported:

I’ve chosen Standard cost, so I’ll activate the standard cost for my released product.

Now we’re ready to create a Consignment replenishment order. Procurement and sourcing > Consignment > Consignment replenishment orders:


Create a new Consignment order, Click new, give proper vendor, site & warehouse details


Add line items for consignment orders


the inventory transaction status of this consignment order reference as a Consignment replenishment order and receipt status is order


now let’s receive our consignment inventory. Procurement and sourcing > Consignment > Consignment replenishment orders > Receive > Product receipt:


After posting the Product receipt the inventory transaction and on hand inventory will be updated.


Note that there are no ledger postings related to the Consignment replenishment order product receipt:


Before we consume this inventory, we need to create an Inventory ownership change journal. Inventory management > Journal entries > Items > Inventory ownership change or Procurement and sourcing > Consignment > Inventory ownership change:


Click New and open the new window form


Create a line, and fill the ‘From’ Site, Warehouse, Location and Owner


Post the journal, system generates the automatic purchase order will be created
 Click OK


The purchase order status is received and the Purchase order header shows an Origin of ‘Consignment’ (and the purchase order line quantity can’t be changed on the Purchase order):


Will look into Inventory transactions status 


The Inventory ownership change journal has consumed some of our consignment inventory and we have a purchase order product receipt (with the normal ledger postings).


So now we can transfer this inventory and consume it on a production order, and we can post a purchase order invoice on the purchase order.

There are some  restrictions on the consignment inventory. You can’t issue the consignment inventory to a transfer order, and you can’t issue the consignment inventory to a production order – you have to posted the ownership change first. But you can count the inventory (up and down), and transfer the consignment inventory using a transfer journal. There’s also a rather neat function to automatically populate the Inventory ownership change journal from production order components.


Monday, February 27, 2017

Vendor Self-service portal and Vendor collaboration in Dynamics 365 For Operations


The Vendor collaboration module is targeted at vendors who don’t have electronic data interchange (EDI) integration with Microsoft Dynamics 365 for Operations. It allows vendors to work with purchase order, invoice, and consignment inventory information. This topic describes how you can collaborate with external vendors who are using the vendor collaboration interface to work with POs and consignment inventory. It also describes how to enable a specific vendor to use vendor collaboration, and how to define the information that all vendors will see when they respond to a PO.

Set the vendor collaboration options for a specific vendor

The general settings for vendor collaboration in Dynamics 365 for Operations are configured by an administrator. For example, they’ll determine which security roles are available for all the vendors that you collaborate with. There are also some settings which can differ for each vendor account, and you should set these:

·         Enable vendor collaboration.

·         Decide whether you want vendor to see price information.


Enable vendor collaboration

Before user accounts can be created for an external vendor, you must configure the vendor account to allow them to use vendor collaboration. To do this, set the Collaboration activation field to active on the General tab on the Vendors page. There are two options that you can choose:

  • Active (PO is auto-confirmed) – Purchase orders are automatically confirmed when the vendor accepts them without changes.
  • Active (PO is not auto-confirmed) – Purchase orders need to be manually confirmed by your organization, after the vendor has accepted them.
 
     Setup the Primary contact for the vendor. I have setup Erin in this demonstration.

 
Decide whether you want the vendor to see price information

If you want to share price information such as unit price, discounts, and charges via the collaboration interface, you need to set the Purchase order prices/amount option to yes on the vendor account. This option is available on the Purchase order defaults tab.


Work with POs when using vendor collaboration (Sending a PO to the vendor)

Purchase orders are prepared in Dynamics 365 for Operations. When the PO has a status of Approved, you send it to the vendor using the Send for confirmation action on the Purchase order page. The PO status changes to In External Review. After the PO has been sent, the vendor can see it on the Purchase orders for review page in the vendor collaboration interface, where they can accept, reject or suggest changes to the order. The vendor can also add comments to communicate information such as changes to the PO. If you want to draw the vendor’s attention to a new PO, you can also use the print management system to send the PO by email.


Then sends the PO to the vendor portal for obtaining confirmation response from vendor.


    Notice at this stage, the PO status is “In External Review”.
    Now, Ellen Gasca the contact Fabrikam Suppliers logs in to Vendor portal and can see that the PO that Contoso just sent is right there on the portal. He logs in and navigates to Purchase Order confirmation workspace.
    • Ellen sees that the PO sent by Contoso appears there and then he goes into the PO details.
    • At this point, as a vendor Ellen from Fabrikam can review the PO header and line details and do the following.
      • Print a copy or original PO if he needs to send it to anyone else
    • Review the PO Header and Line information and Accept or Reject the PO Confirmation request. If he accepts the PO confirmation request, then the PO will be automatically confirmed.
    Additionally, Ellen can suggest changes on the PO, such as Mode of delivery, Delivery date and Quantity. Ellen can also view or attach Notes and documents both at the PO header and line levels at this stage. Let us say he changes the Quantity, as Fabrikam does not seem to have enough stock at the moment to fulfil the order.


    Sunday, March 27, 2016

    Monday, February 29, 2016

    Consistency Check Tool in Dynamics AX 2012R3

    Tables in Dynamics AX 2012 are divided into different categories: Main tables such as Customers, Ledger Accounts, Vendors, Items, etc, Transaction headers such as Sales headers, Purchase order headers, etc, and transaction details such as Sales lines, PO lines, etc. These tables are all related to each other through keys. For example when a sales order is created for customer A123, the customer, sales header and sales line are all linked to each other.

    Occasionally one or more of these transaction records can be abandoned, meaning the parent data was deleted but the transaction still exists. We call these orphans because they exist in the database but are not connected to any other record. While these orphans by themselves cause no problem, they take up space in the database and given enough time, a lot of these orphaned records can cause performance issues.

    Dynamics AX 2012 has a tool to spot and remove these orphans. It’s called the Consistency Check tool. It basically runs through the entire database and locates transaction records that do not have any parent record associated with them. The Consistency check tool is located under System Administration > Periodic > Database > Consistency Check

    Sunday, February 7, 2016

    Wednesday, February 3, 2016

    AX2012R3 Installation

    In this series we will discuss how to install dynamics AX 2012 R3 step by step. we will start by installing AX Basic Components after that we will move to initialization checklist

    Please click here or below link watch the video for Fleet Management in  Dynamics AX2012R3


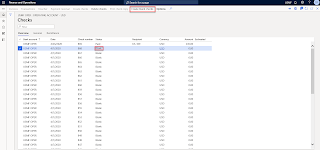
    Create checks that have Blank status for D365FO

      Introduction Microsoft released a new Feature in version 10.0.3 of  Dynamics 365 for Finance and Operations related to Checks in Blank ...